How to Design Your Backyard: Complete Guide with AI (2025)
How to Design Your Backyard: Complete Guide with AI (2025)
Quick Answer: Start with measuring your space and defining zones (entertaining, gardening, play areas). Create a bubble diagram for layout, select plants suited to your climate, then use AI visualization tools to see different design options before committing. Budget 8-12 weeks for DIY design or use AI tools to preview concepts in minutes.
Table of Contents
- Why Design Your Backyard?
- Step 1: Assess Your Current Space
- Step 2: Define Your Goals and Needs
- Step 3: Create a Functional Layout
- Step 4: Choose Your Design Style
- Step 5: Select Plants and Materials
- Step 6: Visualize Before You Build
- Step 7: Budget and Timeline
- Common Backyard Design Mistakes
- Design Checklist
- FAQ
Why Design Your Backyard?
Your backyard isn’t just grass and a fence—it’s untapped potential. A well-designed backyard can:
- Increase home value by 15-20% according to real estate experts
- Extend living space for entertaining, relaxation, and family activities
- Reduce stress through connection with nature and green spaces
- Save money by avoiding costly mistakes and redesigns
- Improve sustainability with native plants and smart water management
Whether you have 500 square feet or 5,000, thoughtful design transforms any backyard from unused space to your favorite room in the house.
Step 1: Assess Your Current Space
Before sketching ideas, understand what you’re working with.
Measure Your Backyard
What to Measure:
- ✓ Overall dimensions (length and width)
- ✓ Location of existing structures (house, shed, garage)
- ✓ Fence lines and property boundaries
- ✓ Trees, large shrubs, and rocks you’ll keep
- ✓ Utility access points (water, electric, gas)
- ✓ Slopes and elevation changes
Tools Needed:
- Measuring tape (100ft recommended)
- Graph paper or digital drawing tool
- Smartphone camera for documentation
- Compass or compass app (for sun direction)
Analyze Site Conditions
Sun Exposure:
Observe your yard throughout the day. Note areas that receive:
- Full sun (6+ hours): Best for most flowering plants, vegetables, play areas
- Partial sun (3-6 hours): Ideal for shade-tolerant plants, patios
- Full shade (< 3 hours): Limited plant options, good for utility areas
Soil Quality:
- Dig test holes in different areas (12 inches deep)
- Sandy soil drains quickly but needs frequent watering
- Clay soil holds moisture but can compact and drain poorly
- Loamy soil (ideal mix) crumbles easily and holds nutrients
Drainage Patterns:
- Where does water collect after rain?
- Do you have standing water issues?
- Where does water flow during heavy rain?
Climate Zone:
- Identify your USDA Hardiness Zone
- Note average rainfall and temperature extremes
- Consider wind patterns and microclimates
Document Existing Features
Take photos from all angles:
- Standing at back door looking out
- From each property corner
- Close-ups of features you’ll keep
- Problem areas (poor drainage, dead zones)
These photos become invaluable when comparing “before” to your future “after” using AI visualization tools.
Step 2: Define Your Goals and Needs
The best backyard designs solve problems and fulfill specific needs.
Ask Critical Questions
How will you use this space?
- Outdoor dining and entertaining guests?
- Play area for children or pets?
- Vegetable or flower gardening?
- Relaxation and meditation?
- Outdoor cooking and grilling?
- Swimming pool or hot tub?
Who will use this space?
- Young children (need safe, visible play areas)
- Teenagers (want privacy and hangout spots)
- Empty nesters (prefer low-maintenance beauty)
- Pet owners (need durable surfaces and fencing)
What’s your maintenance commitment?
- High maintenance: Formal gardens, water features, annual plantings
- Medium maintenance: Mixed perennial beds, small lawns, pruning
- Low maintenance: Native plants, ground covers, minimal lawn
What’s your timeline?
- Immediate transformation (hire professionals, higher cost)
- Phased implementation (DIY over 1-3 years)
- Long-term vision (plan now, build gradually)
Create a Priority List
Rank these common backyard elements by importance to you:
- Patio or deck for entertaining
- Privacy screening from neighbors
- Garden beds and plantings
- Lawn or grass alternative
- Storage (shed, equipment)
- Outdoor kitchen or fire pit
- Water feature or pool
- Children’s play equipment
- Pet-friendly features
- Lighting and electrical
Your top 3-5 priorities become the foundation of your design.
Step 3: Create a Functional Layout
Now translate your needs into physical space.
Zone Your Backyard
Divide your backyard into functional zones:
Public Zones (visible, social):
- Patio or deck near house
- Dining area
- Fire pit gathering space
- Open lawn for activities
Private Zones (secluded, personal):
- Reading nook or meditation corner
- Hot tub area
- Garden workspace
- Sunbathing area
Utility Zones (practical, hidden):
- Shed or storage
- Compost bins
- Vegetable garden
- Air conditioning units
- Trash/recycling area
Draw a Bubble Diagram
On your measured site plan, draw circles (bubbles) representing each zone:
- Large bubbles: Major features (20x20ft patio, 15x30ft lawn)
- Medium bubbles: Secondary features (8x12ft garden bed, 10x10ft play area)
- Small bubbles: Accents (fire pit, water feature, specimen tree)
Don’t worry about exact shapes yet—focus on:
- Proximity: What should be near the house? Near each other?
- Flow: How do you move between zones?
- Sight lines: What do you see from windows and doors?
- Privacy: Which areas need screening?
Design Circulation Paths
People and pets need to move through your backyard:
Primary paths (48-60 inches wide):
- From house to main patio
- From patio to lawn or key features
- High-traffic routes
Secondary paths (24-36 inches wide):
- Garden access
- Side yard connections
- Occasional-use routes
Path materials:
- Concrete or pavers (formal, durable)
- Decomposed granite (casual, permeable)
- Stepping stones (informal, low-cost)
- Mulch or gravel (budget-friendly)
Consider Scale and Proportion
Rule of thirds: Divide space into thirds rather than halves for visual interest
Balance hardscape and softscape:
- 40-50% hardscape (patios, paths, structures)
- 50-60% softscape (plants, lawn, mulch)
Right-size features:
- Patio should accommodate furniture + 30-36 inches clearance
- Trees need 15-20 feet from house and utilities
- Garden beds should be 3-4 feet deep (easy to reach center)
Step 4: Choose Your Design Style
Your backyard style should complement your home architecture and personal taste.
Popular Backyard Design Styles
Modern/Contemporary
- Clean lines and geometric shapes
- Minimal plant palette (3-5 species)
- Bold materials (concrete, steel, composite)
- Architectural plants (ornamental grasses, sculptural succulents)
- Limited color palette
Traditional/Cottage
- Curved borders and organic shapes
- Dense, layered plantings
- Classic materials (brick, natural stone)
- Abundant flowers and varied textures
- Romantic feel with arbors and garden art
Mediterranean
- Warm earth tones and terracotta
- Drought-tolerant plants (lavender, rosemary, olive trees)
- Stone or tile hardscape
- Courtyards and intimate spaces
- Water features (fountains)
Tropical/Resort
- Bold foliage and bright colors
- Large-leaf plants (banana, bird of paradise)
- Natural materials (bamboo, teak)
- Pool or water feature as focal point
- Lush, layered plantings
Native/Natural
- Plants indigenous to your region
- Informal, meadow-like plantings
- Sustainable and low-maintenance
- Wildlife-friendly features
- Mimics natural ecosystems
Asian-Inspired (Zen)
- Simplicity and asymmetrical balance
- Limited plant palette with evergreens
- Natural stone and gravel
- Water features (koi pond, bamboo fountain)
- Contemplative spaces
Select a Cohesive Color Palette
Successful designs limit colors:
- Monochromatic: Shades of one color (peaceful, sophisticated)
- Analogous: Colors next to each other on color wheel (harmonious)
- Complementary: Opposite colors (bold, dramatic)
Pro tip: Choose 1-2 primary colors for flowers, plus green foliage as backdrop.
Step 5: Select Plants and Materials
Now for the fun part—choosing what goes where.
Plant Selection Strategy
Layer Your Plantings (creates depth and interest):
- Canopy layer: Trees (15-50+ feet)
- Understory layer: Small trees, large shrubs (8-15 feet)
- Shrub layer: Medium shrubs (3-8 feet)
- Perennial layer: Flowers and grasses (1-3 feet)
- Ground layer: Ground covers and low plants (< 1 foot)
Choose the Right Plants:
✓ For your climate: Match USDA zone and water requirements
✓ For your soil: Clay-tolerant, sandy-soil, or amended bed plants
✓ For sun exposure: Full sun, part sun, or shade plants
✓ For your goals: Low-maintenance natives vs. high-impact showstoppers
Plant for Four Seasons:
- Spring: Flowering trees and bulbs
- Summer: Perennials and annuals
- Fall: Foliage color and late bloomers
- Winter: Evergreens and interesting bark/structure
Hardscape Materials
Patios and Paths:
| Material | Cost | Durability | Style | Maintenance |
|---|---|---|---|---|
| Concrete | $ | High | Modern/Traditional | Low |
| Natural Stone | $$$ | Very High | Upscale/Natural | Low |
| Pavers | $$ | High | Versatile | Medium |
| Decomposed Granite | $ | Medium | Casual/Natural | Medium |
| Gravel | $ | Low-Med | Informal | High (weeding) |
| Wood Deck | $$ | Medium | Traditional/Warm | High (sealing) |
Fencing and Walls:
- Wood (cedar or redwood for longevity)
- Vinyl or composite (low-maintenance)
- Metal (modern aesthetic, durable)
- Stone or brick (high-end, permanent)
- Living walls (hedge plants, eco-friendly)
Outdoor Structures:
- Pergolas (partial shade, architectural interest)
- Arbors (entry definition, climbing plants)
- Gazebos (full shade, focal point)
- Sheds (storage, can be attractive feature)
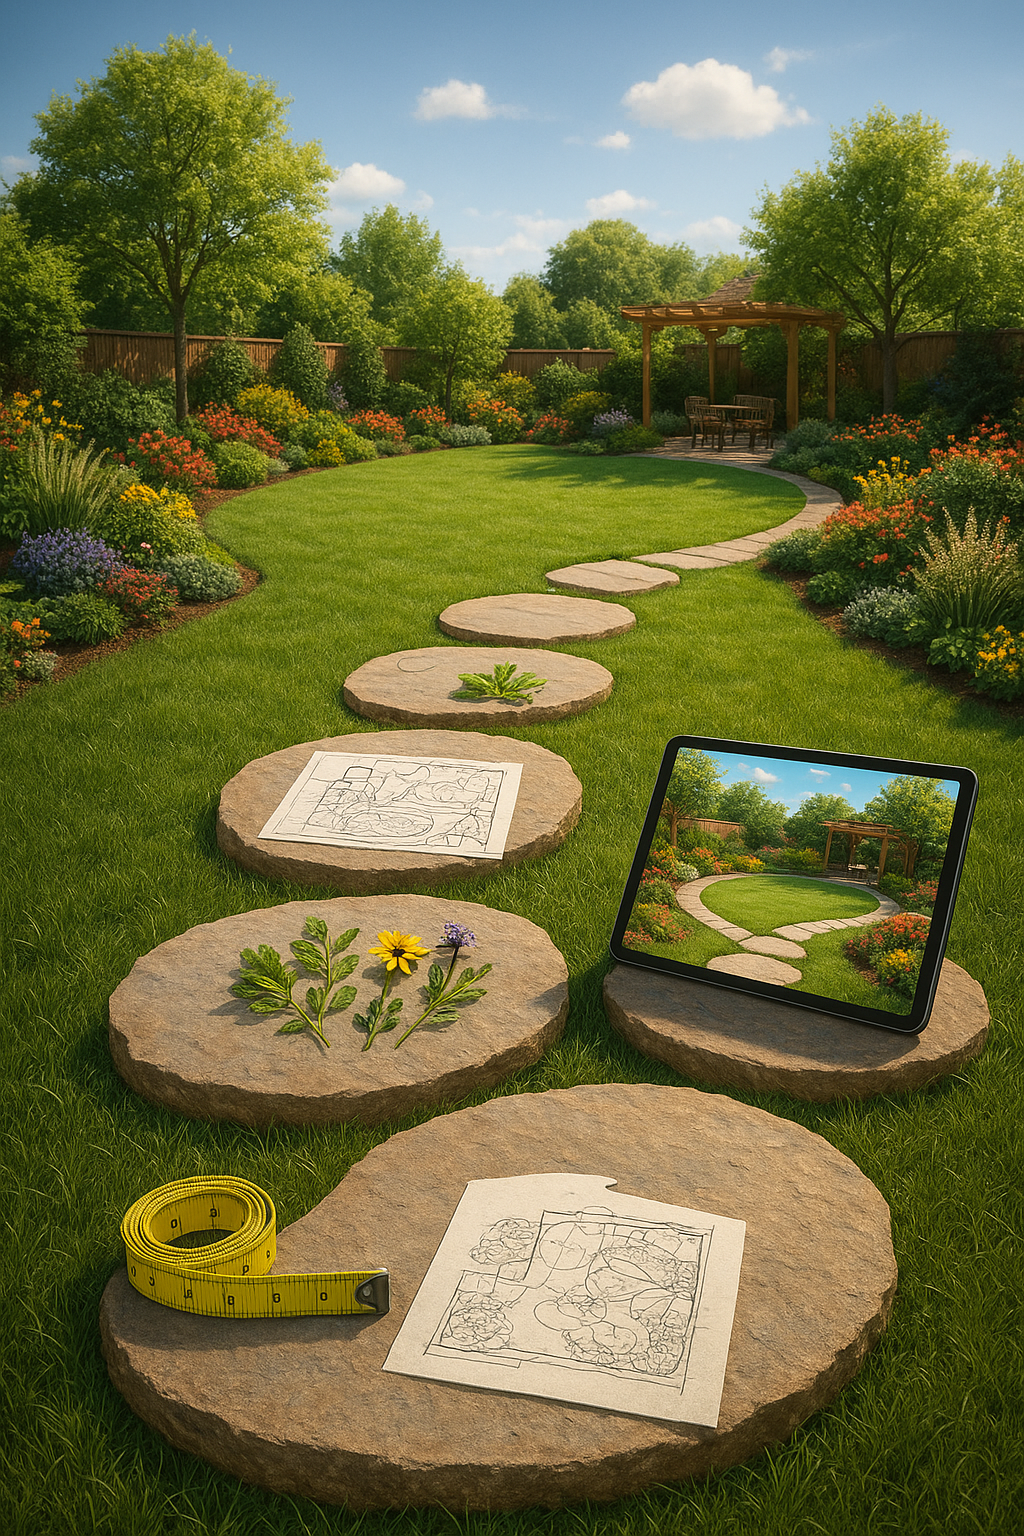
Step 6: Visualize Before You Build
This is where backyard design has been revolutionized by technology.
Traditional Visualization Methods
Hand-drawn plans:
- Sketch to scale on graph paper
- Time-consuming but helps you think through details
- Difficult to envision final result
Computer design software:
- Tools like SketchUp, Planner 5D, or AutoCAD
- Steep learning curve (10-40 hours to master)
- Requires precise measurements and technical skills
- Can create accurate, detailed plans
Physical samples:
- Collect material samples (stone, pavers, wood)
- Create small mockups with stakes and string
- Helps visualize scale but not final aesthetic
AI Backyard Design Tools (Recommended)
Modern AI tools like YardRevision let you see photorealistic versions of your design concepts in minutes, not hours.
How AI Design Works:
- Upload photos: Take pictures of your current backyard
- Describe your vision: Specify style, features, plants
- Generate images: AI creates photorealistic concepts in 30-90 seconds
- Iterate quickly: Try multiple styles, layouts, and ideas
- Share with others: Get family input before committing
Benefits of AI Visualization:
✓ Speed: See concepts in minutes vs. days of planning
✓ No learning curve: Simple descriptions, no technical skills
✓ Multiple options: Try 5-10 different approaches quickly
✓ Realistic previews: See how it will actually look
✓ Early mistake detection: Spot problems before spending money
When to Use AI Tools:
- Exploring style options: Not sure between modern and traditional?
- Testing plant combinations: See colors and textures together
- Getting family buy-in: Show realistic previews to get everyone excited
- Hiring professionals: Communicate your vision clearly to landscapers
- DIY planning: Build confidence before starting projects
Important: AI tools create visual concepts and “artistic renderings”—not construction blueprints. Think of them as inspiration and direction, not precise specifications. You’ll still need:
- Professional measurements for hardscape installation
- Local plant selection advice for your specific conditions
- Building codes and permit requirements for structures
- Contractor estimates for accurate pricing
Compare Design Options
Once you have 3-5 visualized concepts:
Evaluation Criteria:
- Does it fulfill your top priorities?
- Is it within budget (realistic about costs)?
- Does it fit your maintenance commitment?
- Will it work with your climate?
- Does your family love it?
Get feedback:
- Share AI visualizations with family members
- Show to neighbors for privacy concerns
- Consult with local nursery for plant suitability
- Get contractor input on feasibility
Step 7: Budget and Timeline
Reality check time—what will this cost and how long will it take?
Typical Backyard Design Costs
DIY Design + DIY Installation:
- Small refresh (plants, mulch): $500-$2,000
- Medium makeover (patio, plantings): $3,000-$8,000
- Major overhaul (all elements): $10,000-$20,000
DIY Design + Professional Installation:
- Small project: $2,000-$5,000
- Medium project: $8,000-$20,000
- Large project: $25,000-$50,000+
Professional Design + Installation:
- Basic design package: $15,000-$30,000
- Mid-range landscape: $40,000-$75,000
- High-end transformation: $100,000-$250,000+
Cost Breakdown by Element:
- Patio (12x16 pavers): $3,000-$6,000
- Deck (12x16 wood): $4,000-$8,000
- Sod installation (1,000 sq ft): $1,500-$3,000
- Garden bed with plants (100 sq ft): $500-$1,500
- Privacy fence (100 linear ft): $2,500-$6,000
- Outdoor lighting system: $1,000-$3,000
- Irrigation system: $2,000-$5,000
- Fire pit (basic): $300-$3,000
Phased Implementation Strategy
Can’t afford everything at once? Phase your project:
Phase 1 (Year 1): Foundation and Structure
- Clear and grade site
- Install hardscape (patio, paths)
- Basic planting near house
- Budget: 40-50% of total
Phase 2 (Year 2): Primary Plantings
- Major garden beds
- Trees and shrubs
- Lawn or grass alternative
- Budget: 30-35% of total
Phase 3 (Year 3): Finishing Touches
- Specialty features (fire pit, water feature)
- Lighting and irrigation
- Outdoor furniture and decor
- Budget: 20-30% of total
Benefits of phasing:
- Spread costs over time
- Live with design before finalizing
- Adjust based on what works
- Less overwhelming to maintain
Timeline Expectations
DIY Design Timeline:
- Research and planning: 2-4 weeks
- Drawing plans: 1-2 weeks
- Getting estimates/shopping: 1-2 weeks
- Total: 4-8 weeks before construction
With AI Design Tools:
- Concept exploration: 1-3 days
- Finalizing vision: 3-5 days
- Professional consultations: 1 week
- Total: 1-2 weeks before construction
Installation Timeline (professional):
- Small project: 3-7 days
- Medium project: 2-4 weeks
- Large project: 6-12 weeks
Installation Timeline (DIY):
- Plan weekend work sessions
- Allocate 2-3x longer than you expect
- Small: 4-8 weekends
- Medium: 3-6 months
- Large: 1-2 years
Common Backyard Design Mistakes
Learn from others’ expensive lessons:
1. Skipping the Plan
The Mistake: Buying plants and materials impulsively without overall vision
The Fix: Complete Steps 1-6 before purchasing anything
Cost of mistake: $2,000-$5,000 in wrong purchases
2. Ignoring Sun and Shade
The Mistake: Planting sun-lovers in shade or shade-lovers in full sun
The Fix: Observe sun patterns for full days in different seasons
Cost of mistake: $500-$1,500 replacing dead plants
3. Wrong Scale
The Mistake: Tiny patio that can’t fit furniture, huge trees too close to house
The Fix: Measure furniture and mature plant sizes before committing
Cost of mistake: $3,000-$10,000 relocating or replacing
4. Poor Drainage Planning
The Mistake: Creating low spots where water pools, no rain management
The Fix: Grade away from house, plan drainage routes, consider rain garden
Cost of mistake: $5,000-$15,000 foundation damage or erosion repair
5. Forgetting Maintenance
The Mistake: Designing high-maintenance landscape you can’t sustain
The Fix: Be honest about time commitment, choose appropriate plants
Cost of mistake: $2,000-$4,000/year in professional maintenance
6. No Privacy Screening
The Mistake: Overlooking neighbors’ sightlines, no buffer from street
The Fix: Plan privacy elements early (fences, hedges, pergolas)
Cost of mistake: $3,000-$8,000 adding screening later
7. Trendy Over Timeless
The Mistake: Following trends that will look dated in 3-5 years
The Fix: Base design on classic principles, add trendy accents in moveable elements
Cost of mistake: $10,000-$25,000 redesigning entire space
8. DIY Complex Hardscape
The Mistake: Attempting complicated paving, retaining walls, or grading without experience
The Fix: DIY plantings and decor, hire pros for structural elements
Cost of mistake: $5,000-$15,000 redoing failed installations
Design Checklist
Use this checklist to ensure you’ve covered everything:
Planning Phase
- [ ] Measured entire backyard accurately
- [ ] Documented sun exposure through full day
- [ ] Tested soil in multiple locations
- [ ] Identified drainage patterns
- [ ] Noted existing features to keep/remove
- [ ] Located underground utilities
- [ ] Defined primary goals and priorities
- [ ] Established realistic budget
- [ ] Set timeline expectations
Design Phase
- [ ] Created bubble diagram with zones
- [ ] Planned circulation paths
- [ ] Chose cohesive design style
- [ ] Selected color palette
- [ ] Listed required features
- [ ] Planned privacy screening
- [ ] Designed adequate storage
- [ ] Considered outdoor lighting
- [ ] Planned irrigation or watering
Plant Selection
- [ ] Verified climate zone compatibility
- [ ] Matched plants to sun exposure
- [ ] Chose appropriate soil types
- [ ] Planned for four-season interest
- [ ] Layered plant heights properly
- [ ] Selected low-maintenance options
- [ ] Included native plants
- [ ] Avoided invasive species
- [ ] Researched mature sizes
Hardscape Selection
- [ ] Chose durable patio material
- [ ] Planned proper path widths
- [ ] Selected appropriate fencing
- [ ] Sized structures correctly
- [ ] Considered furniture space
- [ ] Planned electrical outlets
- [ ] Included outdoor lighting
- [ ] Designed for accessibility
Visualization Phase
- [ ] Created or viewed design renderings
- [ ] Got family input and approval
- [ ] Adjusted based on feedback
- [ ] Verified scale and proportions
- [ ] Checked budget alignment
- [ ] Consulted with professionals
- [ ] Reviewed local code requirements
- [ ] Finalized material selections
Implementation Phase
- [ ] Obtained necessary permits
- [ ] Got contractor bids (if hiring)
- [ ] Purchased materials
- [ ] Scheduled work timeline
- [ ] Arranged material delivery
- [ ] Prepared site (clearing, grading)
- [ ] Started with hardscape
- [ ] Completed planting last
- [ ] Added mulch and finishing touches
FAQ
How long does it take to design a backyard?
Traditional methods: 4-8 weeks for thorough DIY planning, including research, measurements, drawing plans, and getting estimates.
With AI visualization tools: 1-2 weeks to explore concepts, finalize your vision, and consult with professionals. AI generates realistic previews in minutes, dramatically accelerating the decision-making process.
Professional design: 2-4 weeks for a landscape architect to create detailed plans, depending on complexity.
Can I design my backyard myself or should I hire a professional?
Design yourself if:
- ✓ You have a clear vision and style preference
- ✓ Your project is relatively straightforward
- ✓ You enjoy research and planning
- ✓ Budget is limited (save $2,000-$10,000 in design fees)
- ✓ You’re using AI tools to visualize concepts
Hire a professional if:
- ✓ Your property has significant slopes or drainage issues
- ✓ You’re planning complex hardscape or structures
- ✓ You need help with permitting and code compliance
- ✓ You want a cohesive, high-end result
- ✓ You lack confidence in plant selection
Best of both worlds: Design with AI tools first to clarify your vision, then hire professionals for implementation or technical advice.
What’s the best backyard design software?
For photorealistic AI visualization:
- YardRevision (free tier available) - Upload photos, describe vision, get realistic concepts in under 2 minutes
- Neighborbrite - AI landscape design with mobile app
- DreamzAR - AR-based landscape visualization
For precise technical planning:
- Planner 5D - 2D and 3D design with extensive plant library
- SketchUp - Professional 3D modeling (steep learning curve)
- iScape - Mobile app with drag-and-drop design
Recommendation: Use AI tools like YardRevision for quick concept exploration, then switch to technical software if you need precise measurements for DIY construction.
How much does it cost to design a backyard?
DIY with free tools: $0-$200 (graph paper, measuring tools, basic software)
AI design tools: $0-$50/month (YardRevision offers free tier, premium for unlimited designs)
Professional design fees:
- Basic consultation: $500-$1,500
- Complete design package: $2,000-$5,000
- High-end landscape architect: $5,000-$15,000+
Total project costs (design + installation):
- Small refresh: $2,000-$8,000
- Medium makeover: $10,000-$30,000
- Major transformation: $30,000-$100,000+
What should I design first in my backyard?
Priority order for most homeowners:
- Hardscape foundation (patios, paths, walls) - Most permanent, expensive to move later
- Utilities (irrigation, lighting, electrical) - Install before planting
- Large trees and shrubs - Take years to mature, plant ASAP
- Privacy screening - Fences, hedges for immediate needs
- Lawn or ground cover - Fills in relatively quickly
- Garden beds and perennials - Easier to adjust over time
- Finishing touches (furniture, decor, annuals) - Most flexible
Exception: If budget is tight, establish a beautiful entrance area first (near house) while using temporary solutions (mulch, simple plants) for distant areas.
How do I make a small backyard look bigger?
Design tricks for small spaces:
✓ Use diagonal lines - Paths and beds at angles create depth
✓ Layer heights - Vertical gardening and tiered plantings add dimension
✓ Light colors - Pale pavers, light foliage reflect light and open space
✓ Curves over straight lines - Curved beds create mystery and journey
✓ Limited lawn - Replace grass with patios and garden beds (feels larger)
✓ Mirrors and reflective surfaces - Strategic placement creates illusion of space
✓ Vertical elements - Arbors, tall grasses draw eye up
✓ Fewer, larger plants - Many small plants feel cluttered
What to avoid:
- ✗ Large furniture (use appropriately scaled pieces)
- ✗ Solid fences (use open materials or living walls)
- ✗ Dark colors (make space feel smaller)
- ✗ Clutter (keep clean and organized)
What are the easiest backyard designs to maintain?
Lowest-maintenance backyard design:
Hardscape (50-60% of space):
- Large patio or deck for entertaining
- Decomposed granite or gravel paths
- Rock mulch instead of organic mulch
Softscape (40-50% of space):
- Native plants adapted to your region
- Drought-tolerant shrubs (minimal watering)
- Ground covers instead of lawn
- Perennials over annuals (no replanting)
- Mulch beds to suppress weeds
Features to avoid if low-maintenance is priority:
- ✗ Large lawns (mowing, fertilizing, watering)
- ✗ High-maintenance plants (roses, tropicals in cold climates)
- ✗ Water features (cleaning, pump maintenance)
- ✗ Annual flower beds (replanting each year)
- ✗ Wood structures (staining, sealing)
Estimated maintenance time:
- High-maintenance traditional: 5-10 hours/week
- Medium-maintenance mixed: 2-4 hours/week
- Low-maintenance native: 1-2 hours/week
Do I need a permit to design and build my backyard?
Usually NO permit needed for:
- Planting trees, shrubs, and gardens
- Installing raised garden beds
- Adding mulch or ground cover
- Small patios under 200 sq ft
- Garden paths
- Freestanding furniture and decor
Usually YES permit needed for:
- Swimming pools and hot tubs
- Structures over 120-200 sq ft (sheds, gazebos, pergolas)
- Retaining walls over 4 feet high
- Fences over 6 feet tall
- Permanent outdoor kitchens
- Major grading or drainage changes
- Electrical work
- Plumbing installation
Varies by municipality - Always check with your local building department before:
- Any structure construction
- Significant earth moving
- Installing utilities
- Building near property lines
HOA requirements: If you have a homeowners association, you may need approval even for non-permitted changes. Review your HOA covenants before starting.
Ready to Design Your Dream Backyard?
You now have a complete roadmap for designing your backyard from scratch. Remember:
- Start with assessment - Understand your space before designing
- Define clear goals - Know what you want before choosing features
- Plan the layout - Zone your space for function and flow
- Choose a style - Stick to cohesive aesthetics
- Select wisely - Pick plants and materials for your conditions
- Visualize first - See concepts before committing (AI tools make this fast and easy)
- Budget realistically - Phase projects if needed
The difference between a backyard that disappoints and one you love daily? Taking time to plan before you plant.
Start visualizing your backyard today: Use AI tools like YardRevision to see your ideas come to life in photorealistic renderings. Upload a photo, describe your vision, and explore multiple design directions in minutes—not months.
Your dream backyard is closer than you think. Start designing today.
About the Author
The YardRevision Team includes landscape designers, horticulturists, and technology experts passionate about making professional-quality landscape design accessible to everyone. We combine decades of traditional design experience with cutting-edge AI visualization technology to help homeowners create outdoor spaces they love.